- Download the XAMPP for Windows package. I downloaded the EXE and installed it at the root C: in the XAMPP folder.
- If you also have IIS running on your system, after the installation, change the default port used by Apache.
- The XAMPP installation will automatically ask you if you want to launch its control panel. If it's not already running, go to Start > XAMPP for Windows > XAMPP Control Panel.
- Click to start the Apache and MySql services (if they're not already running). When they successfully start, you'll see a green indicator saying "Running" next to each service. [Note: If the services take too long to start, it's more than likely because port 80 is being used by IIS; follow Step 2 above to change the Apache port to something else and try to start the services again.]

- Download the latest version of Joomla.
- Create a folder named joomla under C:\xampp\htdocs\
- Unzip the contents of the Joomla ZIP file into this new folder.
- Open your browser and navigate to http://localhost/ or, if you changed the Apache port, to http://localhost:xx/, where xx is the port number you assigned to Apache in Step 2.
- Click the phpMyAdmin link and go to "Privileges" on the MySQL database.
- Choose "Add a new User" and give it a name and password you can remember.
- Under "Global privileges" for this user, click "Check All" to grant all rights to this user.
- Click Go to create the user.
- Go to the Databases tab and create a database for Joomla (could be called joomla).
- Open your browser and navigate to http://localhost/joomla/ or, if you changed the Apache port, to http://localhost:xx/joomla/, where xx is the port number you assigned to Apache.
- Follow the wizard until you get to the database screen. Here, enter the information for the database and user you just created. For the host, use localhost. Important: Do not enter the port number after the host name, such as localhost:xx because this will not work and it won't generate an error; enter only the word localhost into the Host Name field.
- Upon successful completion, Joomla asks you to delete the installation folder. Go ahead and do that.
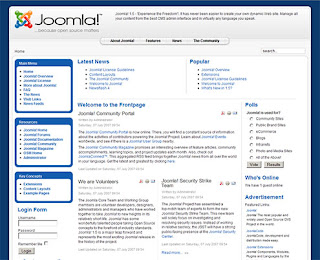
- To see the Joomla home page, reload http://localhost/joomla/ or, if you changed the Apache port, http://localhost:xx/joomla/, where xx is the port number you assigned to Apache.

Additional resources on installing Joomla with XAMPP on Windows and other platforms can be found on the Joomla docs site.
2 comments:
Hello,
Its excellent.Really i loved read this blog.Its highly informative. I would be visiting your blog hereafter regularly to gather valuable information.You can also find interesting stuf here Web Development Services.
Really very informatics information on Joomla CMS. You guys are really doing a great job by sharing this article. I have taken some of the points from this article. Thanks for the great info.
Joomla Development
Post a Comment